Installation
Stair runner gripper and fixings guide
The invisible architecture of a stair runner installation. A runner is only as safe and durable as the gripper that holds it in place.
Written by the StairRunner.co editorial team · Updated 4 September 2026
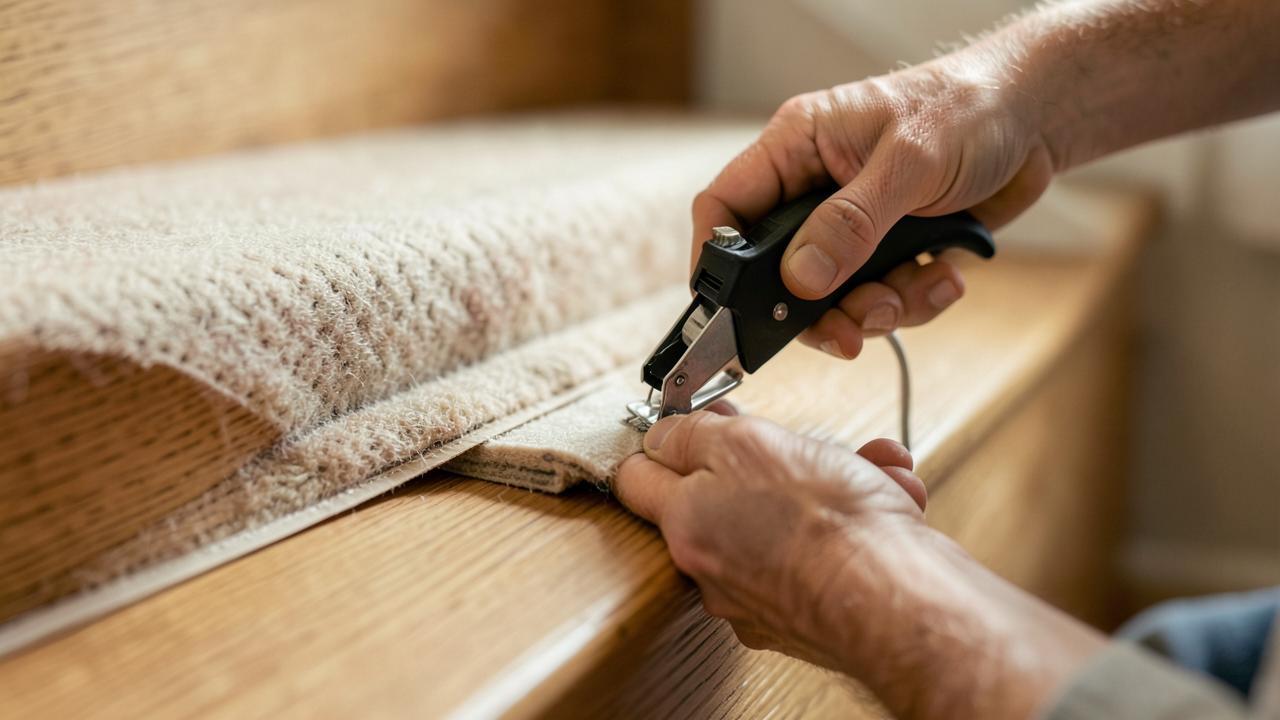
The mechanics of the carpet gripper
To the casual observer, a carpet gripper—often referred to as a tack strip—is a simple piece of plywood with sharp pins. However, in the context of a staircase, it is a high-performance component that must withstand significant shear forces every time someone walks up or down the flight. The gripper's primary job is not just to hold the carpet in place, but to maintain the tension applied during installation. Without this tension, the carpet would eventually 'bag' at the bottom of the risers or, more dangerously, slide forward over the nosing.
A stair runner presents a unique challenge compared to a room carpet. In a room, the gripper is mostly holding the edges against lateral tension. On stairs, the gripper must hold the runner against vertical and horizontal forces, often while the carpet is being pulled in multiple directions around winders or landing turns. This is why the choice of gripper and its precise placement are the two most critical factors in a professional finish.
The physics of the gripper is based on the angle of the pins. The pins are set at an angle (usually around 60 degrees) pointing away from the direction of the stretch. When the carpet is hooked onto these pins and then tensioned using a knee-kicker, the pins dig deeper into the backing. This creates a mechanical lock that is incredibly difficult to shift without the proper tools. This is why a well-fitted runner feels so solid underfoot—it is literally anchored to the structure of the house.
Types of gripper for stair installations
| Type | Best For | Characteristics |
|---|---|---|
| Short Pin (4mm) | Low-profile flatweaves, sisal, jute | Prevents pins from protruding through thin backings |
| Medium Pin (6mm) | Standard twist pile, wilton runners | The versatile 'all-rounder' for most domestic installs |
| Long Pin (8mm) | Deep pile saxony, heavy wool shags | Ensures a firm bite through thick underlay and pile |
| Dual Purpose | High traffic stairs, heavy-duty runners | Wider strip with reinforced pins for maximum tension |
| Concrete/Masonry | Stone or concrete steps | Uses hardened steel nails instead of standard timber nails |
Pin length and pile height: The critical match
One of the most common mistakes in DIY stair runner installation is using the wrong pin length. If the pins are too long for the carpet, they will poke through the surface. While this might seem like a minor aesthetic issue, it is a significant safety hazard—stepping on a sharp pin with bare feet is incredibly painful and can cause injury. Conversely, if the pins are too short, they won't penetrate the carpet backing deeply enough to hold the tension. The runner will eventually pop off the gripper, leading to slips.
When choosing a gripper, you must consider the 'effective height' of your runner. This is the thickness of the backing plus the compressed height of the pile. For a traditional flat-weave sisal, a short-pin gripper is mandatory. For a plush wool runner, you need enough pin length to reach through the fluff and grab the sturdy backing underneath. Always test a small scrap of your runner on a piece of gripper before committing to the whole flight.
If you find yourself in a situation where the pins are just slightly too long, a professional installer will often use a technique called 'tapping down'. Using a carpet hammer, they gently tap the pins toward the floor once the carpet is hooked. This bends the pins slightly, reducing their height while maintaining their grip. This is a skilled maneuver; over-tapping will release the tension, while under-tapping leaves the safety hazard in place.
Placement and the 'Gully' logic
The geometry of the stair crotch (where the horizontal tread meets the vertical riser) is where the magic happens. A strip of gripper is placed on the tread, and another on the riser. By leaving that small gap—the gully—the installer can use a bolster tool to drive the carpet into the corner. This action 'loads' the gripper pins. As the carpet is forced into the gully, the pins bite into the backing and pull the carpet tight across the tread and down the riser.
The width of the gully should be roughly twice the thickness of the carpet. If the gully is too narrow, you won't be able to tuck the carpet in properly, and the finish will look 'fat' or rounded. If it's too wide, the carpet won't be under enough tension, and you'll see a gap between the runner and the wood. Precision here is what separates a professional installation from a mediocre one.
In addition to the crotch, gripper is often required at the very top and very bottom of the flight. At the top, the runner must be secured before it transitions to the landing carpet. At the bottom, it needs to be anchored to the final riser or the floor itself. Each of these points requires a different approach to gripper orientation to ensure the tension is maintained throughout the entire length of the runner.
Fixing to different stair materials
Most UK homes have timber stairs, usually softwood or plywood. Standard carpet grippers come with pre-installed nails that are perfectly suited for these materials. However, if you are fitting a runner to a period home with original hardwood stairs (like oak or mahogany), you need to be aware that the wood is much denser. Standard nails may bend or split the wood. In these cases, it's often necessary to pre-drill small pilot holes or use a heavy-duty stapler in conjunction with the gripper.
Concrete or stone stairs require 'masonry gripper'. This looks identical to standard gripper but uses hardened steel nails that can be driven into the substrate. Alternatively, on high-value stone stairs where you cannot drill holes, a specialized epoxy adhesive can be used to bond the gripper strips to the stone. This is a permanent installation, so it requires careful consideration before proceeding.
Metal stairs, often found in industrial conversions or external staircases, present the most significant challenge. In these cases, mechanical fixings like self-tapping screws are often used to secure the gripper, or a high-strength industrial adhesive system is employed. Each substrate requires a specific fixing strategy to ensure the gripper remains immovable for the life of the installation.
Tensioning: The role of the knee-kicker
You cannot achieve the necessary tension for a stair runner by hand. A knee-kicker is an essential tool. It allows the installer to 'kick' the carpet forward, stretching it over the nosing and onto the gripper pins. The goal is to have the runner so tight that it sounds like a drum when you tap it. This level of tension ensures that the fibers of the carpet are not under individual stress, but rather the whole backing is working as a single unit to resist movement.
On the risers, the tension is just as important. A loose riser will sag, catching the toes of people walking up the stairs. The knee-kicker is used to pull the carpet down the riser and into the tread gully, where it is then locked off. For very long flights, a power stretcher might be used on the landings, but for the steps themselves, the knee-kicker remains the king of tools.
Using a knee-kicker requires technique. It's not about brute force, but about a controlled, rhythmic strike that moves the carpet just a few millimeters at a time. Professional installers develop a feel for the carpet's elasticity, knowing exactly how much 'give' each material has. Natural fibers like wool have a different stretch profile than synthetic materials like polypropylene, and the installer must adjust their technique accordingly.
Dealing with winders and turns
When a staircase turns, the gripper placement becomes even more complex. On a winder (a triangular step), the runner is being pulled at an angle. The gripper must be placed to counteract this diagonal pull. Often, installers will use multiple short lengths of gripper rather than one long strip to follow the contours of the turn. This ensures that every part of the carpet backing is engaged with pins, preventing the 'fanning' effect that often ruins the look of a turning runner.
Landing turns often require 'double gripping'. This involves placing two rows of gripper side-by-side to provide extra holding power where the carpet transition occurs. This is covered in more detail in our guide on stair runners with a landing turn.
The physics of a turn mean that the runner is under more tension on the 'outside' of the turn than the 'inside'. The gripper must be expertly placed to ensure this uneven tension doesn't lead to the carpet distorting or pulling away. In extreme cases, an installer might use a combination of gripper and specialized adhesives to lock the runner in place around a tight spiral.
Why cheap gripper is a false economy
It's tempting to buy the cheapest box of gripper available at a big-box DIY store. However, the difference between trade-grade gripper and budget consumer versions is significant. Trade gripper uses high-quality birch plywood that doesn't delaminate when you nail it. It also uses zinc-plated pins that won't rust if they get damp (which can happen during professional cleaning). Budget gripper often uses inferior wood that can split, causing the pins to loosen over time. If a single strip of gripper fails, the whole runner can become unstable.
Furthermore, trade-grade gripper often has a more consistent pin angle. The pins are angled toward the wall (or the crotch of the step) to ensure that when the carpet is stretched, the pins bite deeper rather than letting go. Inconsistent pin angles are a hallmark of cheap manufacturing and lead to 'popping'—where the carpet lets go of the fixing unexpectedly.
The longevity of the installation is directly tied to the quality of the gripper. A high-quality gripper can last through multiple carpet replacements, whereas a cheap one may need to be ripped out and replaced every time, potentially damaging the stairs further with each installation. In the long run, investing in trade-grade fixings is the more cost-effective choice.
Gripper and Underlay: The Partnership
Gripper doesn't work in isolation; it works in partnership with the underlay. The underlay should be cut so that it sits just inside the gripper perimeter. If the underlay overlaps the gripper, it will prevent the pins from biting the carpet. If there is a large gap between the underlay and the gripper, you will feel a 'dip' underfoot at the edges of the steps.
For stairs, a firm, high-density rubber or felt underlay is preferred. This provides a stable base that doesn't 'bottom out' under foot traffic, which in turn reduces the vertical stress on the gripper pins. A soft, bouncy underlay might feel nice initially, but it allows the carpet to move too much, which eventually shears the pins or wears the carpet backing. Learn more about this in our stair runner underlay guide.
The height of the underlay should be slightly lower than the height of the gripper pins. This ensures that the carpet is supported but the pins are still the primary point of contact for tensioning. If the underlay is too thick, it will lift the carpet off the pins, leading to a loose and unsafe installation.
Safety considerations and maintenance
Once installed, the gripper should be completely invisible and undetectable to the touch. If you can feel the sharp pins through the carpet, the installation is faulty. This usually means the pins are too long or the pile has been crushed during installation. In some cases, a professional can 'dress' the pins—tapping them down slightly with a hammer—to make them safer, but this should be done with caution to avoid losing the grip.
Over time, the pins can lose their bite if the runner is subjected to extreme humidity changes or if the stairs themselves move (common in older homes). If you notice a 'crunching' sound when you step on the runner, or if you see the carpet starting to pull away from the riser, the gripper may have failed. This requires immediate attention, as a loose runner on stairs is one of the leading causes of domestic falls.
Regularly check the edges of your runner for any signs of lifting. A quick thumb-press along the 'gully' will tell you if the carpet is still firmly hooked. If you feel any movement, it's best to call in a professional to re-tension the runner before it becomes a hazard.
Removal and Stair Preservation
Removing carpet gripper can be a messy process. The nails leave small holes in the timber, and if the gripper was also glued, there will be residue. To minimize damage when removing old gripper, use a wide-blade bolster or a dedicated gripper removal tool to pry the strip up from the ends. Avoid prying in the middle of the strip, as this is more likely to cause the wood to splinter.
If you are planning to restore your wooden stairs after removing a runner, the holes left by the gripper can be filled with a high-quality wood filler that matches the color of your treads. Sanding and refinishing will hide these marks remarkably well, though they will never be entirely invisible. This is the trade-off for the safety and comfort that a runner provides.
Summary of best practices
- Match the pin to the pile. Never use long pins for flat-weaves.
- Mind the gully. 10-15mm is the sweet spot for a crisp, tight finish.
- Quality matters. Use trade-grade plywood gripper with zinc pins.
- Tension is safety. Use a knee-kicker to ensure the runner is 'drum-tight'.
- Check for 'proud' pins. Ensure no sharps are felt through the finished surface.
- Substrate awareness. Use masonry nails for concrete and pilot holes for hardwood.
- Turn management. Use short, angled sections of gripper for winders.
Understanding the role of the gripper is the first step in ensuring your stair runner lasts for decades rather than years. While it’s the least glamorous part of the project, it is undoubtedly the most important for safety and longevity. For more on the actual process of putting the runner down, see our full installation guide.
Frequently asked questions
- Can you install a stair runner without gripper?
- It is possible using staples or adhesive, but gripper remains the industry standard for a reason. It provides the mechanical tension required to keep the runner tight over the nosing, preventing the carpet from bagging or sliding over time.
- What is the difference between short pin and long pin gripper?
- Short pin gripper is designed for thin, flat-weave runners like sisal or jute, ensuring the pins don't poke through the face. Long pin gripper is for thicker, plush pile carpets where more 'reach' is needed to grab the backing.
- Where exactly should the gripper be placed on a stair?
- Typically, one strip is placed at the base of the riser and another on the tread, roughly 10-15mm away from the crotch of the step. This 'gully' allows the carpet to be tucked and tensioned effectively.
- Does gripper damage wooden stairs?
- Gripper is nailed into the tread, so it will leave small holes. If you have pristine hardwood stairs you wish to preserve, you might consider alternative methods like adhesive-free tapes, though these offer less tension.
- How many pins should a stair gripper have?
- Standard gripper has two rows of zinc-plated pins. For high-traffic stairs, 'dual purpose' gripper is often used, which features extra-strong pins and a wider profile for maximum grip.
- Is gripper reusable when changing the carpet?
- If the wood is still solid and the pins are not bent or rusted, you can reuse gripper. However, for a high-traffic area like stairs, installers often prefer to fit new gripper to ensure the tightest possible fit for the new runner.
- What should I do if the gripper is squeaking?
- Squeaking is usually caused by the gripper strip rubbing against the stair tread or the nails being slightly loose. Adding a few extra ring-shank nails or a bead of construction adhesive under the strip can solve this.
Related guides
- InstallationHow to Install a Stair RunnerWaterfall and Hollywood methods, staples versus rods, tools, sequence and quality checks.
 MaterialsStair Runner Underlay and PaddingWhy pad choice matters more on stairs than anywhere else, and how to specify density, thickness and cut.
- InstallationStaples for a Stair RunnerStaple size, crown width, placement and how to make the fixings disappear into the pile.