Installation
What size staples for a stair runner, and how to hide them
Staples are the least glamorous part of a runner installation and the part most likely to be got wrong. Length, crown width and placement decide whether the fixings vanish or announce themselves.
Written by the StairRunner.co editorial team · Updated 4 September 2026
What a staple actually has to do
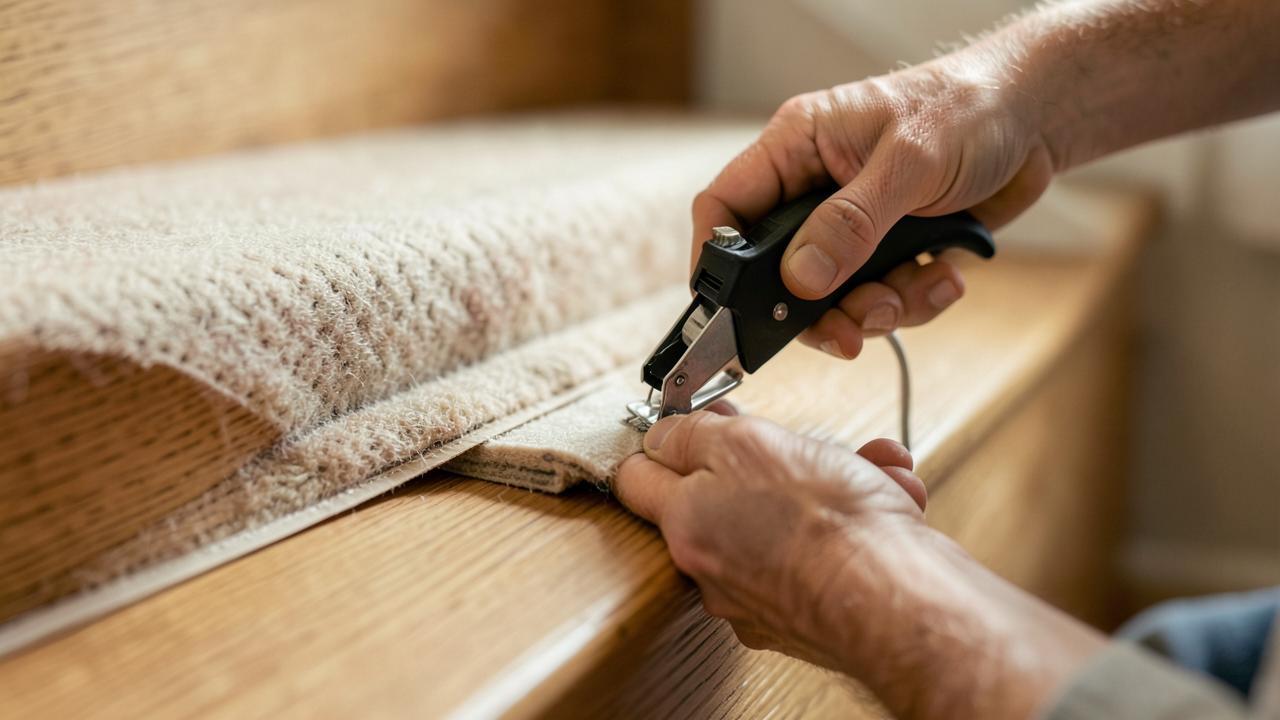
A stair runner is not simply lying on the staircase. It is being pulled downwards by every footfall, pushed forwards over the nosing, and dragged sideways by anyone who turns on the step. The fixings hold the covering tight into the angle of each step so it cannot lift, bridge or creep. A staple that only grips the surface fibres will pull out; a staple that crushes the pile flat will still be visible in five years. Getting the specification right is the difference between an installation that disappears and one you notice every time you walk down.
There are three variables to settle before you start: leg length, crown width and where each fixing goes. Everything else — gun type, pressure, brand — matters far less than those three.
Leg length: measure, do not guess
The rule is simple. A staple must pass completely through the runner and any underlay beneath it, then bury enough leg in the timber to resist being pulled straight back out. The thing people forget is that both layers compress under the gun, so the figure you need is the compressed thickness, not the relaxed thickness you measure by eye on the roll.
Take an offcut of your runner, lay it on an offcut of your pad, press hard with a flat block, and measure the stack. That is your working number. The staple leg needs to exceed it by a useful margin so there is real timber engagement underneath. Too short and the fixing relies on the pad rather than the stair. Too long and the leg can burst through a thin riser board or hit the underside of a tread on an open staircase.
Different constructions change the number dramatically. A flatweave laid directly on timber needs very little. The same runner over a dense pad needs noticeably more. A thick wool pile over the same pad needs more again. Where you are working across a staircase that has been altered — a new pad on old steps, for instance — check the stack thickness again rather than assuming last week's setting still applies. Our underlay guide explains how pad density changes the compressed figure.
Crown width and staple type
The crown is the bridge between the two legs — the part that stays visible. Narrow-crown staples of the sort used in carpet and upholstery work are preferred because the crown can settle between tufts rather than sitting on top of them. A wide construction crown, the kind used for sheathing, flattens a visible band of pile and cannot be hidden however well you brush it.
Point geometry matters too. Divergent points spread apart inside the timber and hold better in softwood, which is what most stair carriages are built from. Chisel points drive straighter in hardwood. If the staircase is in a hallway that gets wet — a back door, a cellar stair, an unheated porch — choose a rust-resistant staple, because a corroding fixing stains the pile from below and the mark will not clean out.
| Stack | What to watch |
|---|---|
| Flatweave, no pad | Short legs; a long staple will not seat and the crown will stand proud. |
| Flatweave over pad | The pad does the compressing. Measure the stack under pressure, not relaxed. |
| Wool pile over pad | Longest legs of the common combinations; pile hides crowns well once raked. |
| Sisal or jute over pad | Rigid, low pile with nowhere for a crown to hide. Placement discipline matters more here than anywhere else. |
Natural-fibre runners are the hardest case, because there is no soft pile to close over the fixing. Everything has to go into the crease and the extreme edge. See our sisal and jute guide for the wider set of compromises those materials ask for.
Where each staple belongs
Placement is what separates a professional-looking job from an obviously amateur one. There are three zones on every step, and they are not equally forgiving.
The crease
The internal angle where the tread meets the riser below it is the primary fixing line. It is in shadow, the pile folds over it naturally, and it is exactly where the runner is under most tension. The majority of your fixings go here, spaced closely enough that the covering cannot bridge the angle anywhere along its width. Pushing the runner hard into the angle with a bolster or a blunt tool before firing is what makes this line tight.
The outer edges
Along both long edges of the runner, staples stop the sides lifting and curling. These are the fixings people skip because they are more visible, and skipping them is the single most common reason a DIY runner looks tired within a year. Keep them right at the very edge, inside the binding or border if there is one, where the change in texture already breaks the eye.
Under the nosing
Where the runner wraps over the front edge of the tread, a line of fixings tucked underneath holds the wrap without anything showing from above. This is invisible from normal standing height and does a lot of work. Check the tread has solid timber underneath before firing here — on some staircases the nosing overhangs thin air.
What you generally avoid is the open field of the tread. A staple in the middle of the step is both visible and pointless: the tension is at the angles, not in the flat.
Making the fixings disappear
Three habits do almost all the work. First, sink the crown slightly below the pile surface rather than flush with it — controlled by gun pressure, tested on your sample step. Second, rake the pile back across the crown immediately with your fingers or a stiff brush, before it sets in the compressed position. Third, on a patterned runner, place each visible fixing in the darkest part of the pattern rather than in a pale field, which removes the shadow that gives a staple away. Our pattern guide covers how much visual noise different designs give you to hide in.
If a staple ends up proud and will not sink, do not hammer it flat — that crushes the pile around it permanently. Pull it and replace it slightly to one side.
Staples and the staircase itself
Every staple is a small hole. On a painted riser that is nothing; on a valuable hardwood tread it matters. This is the honest trade-off of a stapled installation: it holds extremely well, it costs nothing in hardware, and it is not reversible without leaving evidence. The holes are small and filler handles them, but the finish over a filled hole is rarely invisible on a stained or oiled tread.
If the staircase is period, rented, or has a finish you are unwilling to mark, the answer is not shorter staples — it is a different method. Stair rods, tackless strip inside the runner line, or a fully removable approach all avoid puncturing the visible faces. Our guides on fitting a runner without nails and stair rods and hardware set out those alternatives in detail.
Common mistakes
- Using one staple length for the whole job when the pad changes thickness partway up, for example where a landing pad meets a stair pad.
- Firing at an angle so one leg buries and the other stands proud. Hold the gun square to the surface.
- Fixing before the runner is pulled tight. A staple locks in whatever slack is present at the moment it fires; it cannot take it out afterwards.
- Working down the staircase rather than settling the runner at the top first. Sequence is covered in the installation guide.
- Ignoring the outer edges to keep fixings out of sight, then wondering why the runner curls.
When staples are not the right answer
Staples suit a permanent installation on a staircase you are happy to mark, with a runner and pad you have measured. They are a poor fit for rentals, for runners you expect to rotate, for very stiff natural fibres on a staircase with no shadow line, and for staircases where the treads are the finished feature. In those cases read how a runner is actually held safe before defaulting to a gun, because the safety requirement can usually be met another way.
Frequently asked questions
- What size staples should I use for a stair runner?
- The staple has to pass through the runner, through any underlay, and still leave enough leg buried in sound timber to hold. In practice that means measuring the compressed thickness of your runner and pad, then choosing a leg length comfortably longer than that figure. A thin flatweave over no pad needs a much shorter staple than a thick wool pile over a dense pad, and using one length for both is why fixings either sit proud or fail to bite.
- What kind of staples work best?
- Narrow-crown staples designed for carpet or upholstery work are the usual choice, because the crown is small enough to sink between fibres and disappear. Wide construction crowns flatten the pile in a visible line. Divergent-point staples grip better in softwood. Whatever the type, it should be rust-resistant if the staircase is anywhere damp.
- How do you hide staples on a stair runner?
- Place them where the eye does not travel and where the pile can close over them: into the crease where the tread meets the riser, and along the very edge of the runner rather than out in open field. Then rake the pile back over the crown with your fingers or a stiff brush. On a patterned runner, sinking each staple into a dark part of the pattern makes it effectively invisible.
- Can staples damage a hardwood staircase?
- They leave small holes. On the tread face those holes are visible if the runner is ever removed, which is why most of the fixings belong in the crease and under the nosing rather than on show. If you want a genuinely reversible installation, staples are the wrong method — use rods or a mechanical system instead.
- How many staples does each step need?
- Enough that the runner cannot lift or shift anywhere along its width, with fixings concentrated where the covering is under most strain: the crease and the outer edges. Skipping the edges is the most common cause of a runner that curls at the sides after a few months.
Related guides
- InstallationHow to Install a Stair RunnerWaterfall and Hollywood methods, staples versus rods, tools, sequence and quality checks.
 InstallationStair Rods, Clips and Runner HardwareHow stair rods, clips, brackets and bars actually work, when they hold a runner and when they are decorative.
 MaterialsStair Runner Underlay and PaddingWhy pad choice matters more on stairs than anywhere else, and how to specify density, thickness and cut.
- InstallationFitting a Runner Without NailsRods, tackless strip, adhesive systems and removable methods for staircases you cannot puncture.