Installation
Stair rods, clips and runner hardware
Rods are the most misunderstood part of a runner installation. Here is what each type of hardware does, what it does not do, and how to specify a set that fits.
Written by the StairRunner.co editorial team · Updated 4 September 2026
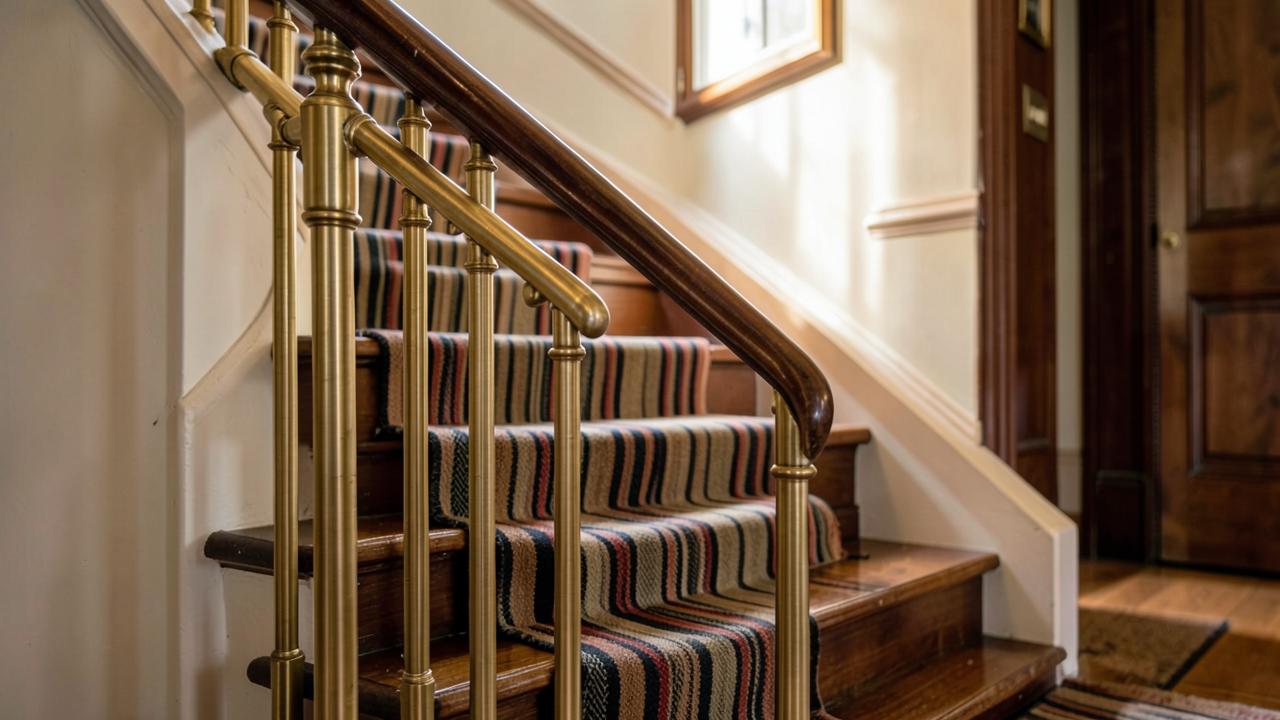
The hardware family
| Hardware | What it is | Structural? |
|---|---|---|
| Decorative rod | A full-width metal or timber bar held by two end brackets, sitting in the crease | No — visual only |
| Holding rod | A rod system designed to clamp the runner into the crease, often with a channel | Yes, when installed to the maker's instructions |
| Clips / holders | Short decorative fittings at each side of the tread instead of a full bar | No |
| Brackets | The mounts screwed into the riser or tread that carry the rod | They carry the rod, not the runner |
| Finials | The end caps that finish each rod | No |
Materials and finishes
Solid brass, brushed nickel, chrome, matt black powder coat, antique bronze and stained timber are the common options. Two practical points matter more than fashion. First, hollow tubes dent more easily than solid bar in a household where things get carried up and down. Second, a lacquered finish keeps its colour, while unlacquered brass will patinate — lovely if intended, disappointing if unexpected.
Match the metal to the nearest fixed metalwork you can see from the stairs — handrail brackets, door furniture, a hall light — rather than to the runner itself. That is what makes a rod set look specified rather than bought.
Sizing and ordering
- Settle your runner width and side margins first.
- Add the maker's recommended side allowance — commonly 25–50 mm (1–2 in) each side — to get rod length.
- Count the rods you need: one per step in the crease, and decide separately whether the top step and landing edge get one.
- Order one or two spares. Finishes shift between production batches.
Fitting sequence
Rods go on last. Fit the pad, fix the runner, check the tension and centring down the whole flight, then mark bracket positions with a template so every rod sits at the same height above the tread. Fitting brackets before the runner almost always leaves them a few millimetres off once the pile thickness is in place.
Set the brackets into the riser or the tread according to the maker's instruction, and drill pilot holes — driving screws straight into hardwood risers splits them more often than people expect.
When rods are the wrong choice
- Very busy or very low-clearance stairs where a raised bar becomes a toe catch.
- Winders and curves, where a straight rod cannot follow the nosing.
- Strongly patterned runners, where a bright metal line every step competes with the pattern instead of framing it.
- Waterfall installations, where the runner does not press into the crease in the way a rod assumes. See waterfall vs Hollywood.
A short history of why rods exist at all
Stair rods predate the fixing methods used today. Before tack strip and staples became standard, a runner was commonly held in place largely by rods clamped into brackets at each tread, with the rod itself doing real structural work. As tack strip and, later, staple guns became the normal way to secure a runner, the rod's job shifted from holding the carpet down to finishing the look of the crease. That history is why rods still look load-bearing even on installations where they are not, and why the distinction between decorative and holding rods matters so much when you are assessing an existing staircase or planning a new one.
Anatomy of a rod set
A full rod set is made up of more parts than the rod itself. The bar is usually a solid or tubular length of metal or timber. Brackets, sometimes called cups or eyes, are screwed into the tread or riser and hold the bar at each end. Finials screw or push onto the ends of the bar to finish it and, on some designs, to lock it into the bracket. Some ranges add a decorative collar where the bar meets the finial. Knowing these names helps when ordering spares or replacements, since suppliers often sell brackets and finials separately from the bars.
Choosing a bracket type
| Bracket type | Fitting point | Notes |
|---|---|---|
| Riser-mounted | Screwed into the vertical riser face, in the crease | The most common arrangement; keeps the rod close to the crease line |
| Tread-mounted | Screwed into the horizontal tread near the back edge | Used where the riser is not accessible or is a poor fixing surface |
| Stair-eye (recessed) | Set slightly into the timber for a flush look | Neater finish, requires more careful drilling to align across all steps |
Getting the height and spacing consistent
The single most common visual failure with stair rods is inconsistent height: one rod sits a few millimetres higher or lower than its neighbours, and once you notice it on one step you see it on every step below. This almost always comes from fitting brackets before the carpet and pad are finally tensioned, which changes the effective tread height by the thickness of the pile. The fix is procedural rather than technical: fit the runner completely first, then use a simple card or timber template cut to the desired height above the tread to mark every bracket position before drilling a single hole.
Rods on unusual staircases
- Very narrow runners: short rods can look disproportionately heavy against a narrow band of carpet; a slimmer or lower-profile rod design usually reads better.
- Open-sided stairs: one bracket has nothing solid to fix into on the open side, so open-sided flights often use clips or a single bracket design instead of a full rod, or omit hardware entirely.
- Stairs with an existing handrail bracket pattern: choosing a finish and style that echoes the handrail ironwork ties the whole staircase together visually.
- Very shallow risers: a rod that projects too far from the riser face can reduce usable tread depth on shallow steps; check the bracket's projection dimension before ordering.
Buying decisions worth making deliberately
Rod sets are sold both as fixed-length bars cut to a standard size and as bars you cut to length yourself. If your staircase runner width is a common size, a fixed-length set will usually be less expensive and better finished at the cut ends. If your width is unusual, or you are matching an existing older rod that has since gone out of production, a cut-to-length option avoids buying a full new set for one non-standard width. Either way, order finials and brackets from the same range as the rod itself; mixing manufacturers' fittings on the same bar is a common source of a poor, wobbly fit.
How hardware interacts with cleaning and maintenance
Rods have to be lifted out, or at least loosened, for a thorough vacuum of the crease, which is where dust and grit collect fastest on any staircase. Choose a bracket design that allows the rod to be removed without tools if the household vacuums stairs often; some cheaper bracket designs require a screwdriver every time, which in practice means the crease never gets cleaned properly. See our cleaning guide for a fuller routine, and the underlay guide for how pad choice affects how the rod sits once everything is fitted.
Frequently asked questions
- Do stair rods make a staircase louder or quieter?
- Rods themselves have a negligible effect on sound, but they allow for a Hollywood-style fitting which keeps the carpet tight against the tread, reducing the "drumming" effect of loose carpet. However, if a bracket becomes loose, the rod may rattle, which is a sign it needs maintenance.
- Can I use stair rods with a sisal runner?
- Yes, stair rods look particularly effective with natural fibres like sisal or seagrass. Because these materials are stiffer, the rod helps define the crease which can otherwise look slightly soft. Ensure the rod diameter is sufficient to look proportional against the thicker weave of a natural runner.
- Do stair rods actually hold the runner down?
- On most modern installations, no. The runner is held by tack strips or staples in the crease between tread and riser, and the rods sit over the top as decoration. Genuine holding rods exist — they clamp the runner into the crease and are usually specified as such by the maker — but assuming a decorative rod is structural is a common and unsafe mistake.
- What length stair rod do I need?
- Rod length is normally the runner width plus roughly 25–50 mm (1–2 in) at each side so the finials clear the brackets. Measure your chosen runner width first, then buy rods to suit — not the other way round. Check the maker's own sizing chart, because bracket depth varies.
- Can I use rods on a winder or curved staircase?
- On winders the tread depth changes across the width, so a straight rod will not sit parallel to the nosing. Some installers omit rods on winders and resume them on the straight flight; others use shorter rods set to the narrow end. Decide this before ordering a full set.
- Are clips a cheaper alternative to rods?
- Clips and holders give a similar visual accent at each side of the tread for less money and less fitting time. They do not read as a continuous line the way a full rod does, so they suit simpler runners better than formal traditional schemes.
- How many rods does a typical staircase need?
- One per tread crease is standard, plus a decision on whether the top and bottom steps get one. On a fourteen-step flight that is usually twelve to fourteen rods, so check whether a set is sold as a full flight or priced per rod before ordering.
- Do rods need maintenance?
- Lacquered finishes need only occasional dusting and a soft cloth. Unlacquered brass will need polishing if you want to slow or reverse patination, and any rod should be lifted out and checked periodically for a loose bracket, especially on a well-used stair.
- Can I fit rods myself after a professional installs the runner?
- Yes, provided the runner is already correctly tensioned and fixed. Fitting rods is largely a measuring and drilling task rather than a carpet-fitting one, which makes it one of the more approachable DIY additions to a professionally fitted stair.
Related guides
 InstallationHow to Install a Stair RunnerWaterfall and Hollywood methods, staples versus rods, tools, sequence and quality checks.
- InstallationDIY Stair Runner InstallationAn honest assessment of doing it yourself: skills, tools, time, safety and the jobs worth handing over.
- ComparisonsWaterfall vs Hollywood InstallationThe two ways a runner meets the tread nosing, and what each means for looks, wear and material use.
 MeasurementWhat Width Should a Stair Runner Be?How to set runner width and side margins from your stair width, stringers, balusters and pattern.
Rod finishes and room acoustics
While the primary purpose of stair rods is visual, they also contribute to the "heft" and perceived quality of the staircase. From an acoustic perspective, a well-fitted rod set ensures the runner is pinned firmly into the junction of the tread and riser. This minimises the pocket of air that can act as a sound chamber. If you are aiming for a whisper-quiet staircase, pairing a high-quality wool runner with solid (rather than hollow) brass rods provides the most significant reduction in impact noise. The weight of the solid metal helps dampen vibrations in the timber, particularly in older houses with hollow-sounding box stairs.
The mechanics of holding rods vs clips
Understanding the difference between a decorative rod and a holding rod is critical for staircase safety. A decorative rod sits in a bracket that is screwed to the wood, but the rod itself only lightly touches the carpet. A holding rod system often uses a specialised "hinged" bracket or a heavy-gauge bar that physically compresses the runner into the crease. These are much more difficult to install because the tension must be perfectly uniform across the flight to prevent the runner from bunching. Clips, on the other hand, are small triangular or circular plates that screw into the corners of the tread. They provide the "accent" of metalwork without the visual weight of a full bar, making them ideal for narrow staircases where a full rod might look cluttered.
Maintenance and long-term care of stair hardware
Stair hardware is subjected to significant vibration and temperature changes, which can cause screws to loosen over time. A biannual check is recommended: gently wiggle each rod to ensure the brackets are still tight against the timber. For the finish, most modern rods come with a factory lacquer. You should never use abrasive metal cleaners on lacquered rods, as this will strip the coating and lead to uneven tarnishing. A simple damp cloth is sufficient. For unlacquered "living" finishes like antique brass, you can either let them patinate naturally for a historic look or use a specialist wax to maintain a consistent level of shine without the harshness of a liquid polish.